If you’ve ever wondered how to easily stain glass bottles and jars, you’ve come to the right place. The methods below can be used for many different projects, such as vases, bowls, jars, and more! The beauty of stained glass is that using it in your home can make it unique and special to you.
Table of Contents
What Is Stained Glass
Traditional stained glass is an art that can be found in churches and historic buildings. It works by putting together small pieces of stained glass to form larger artworks. You can reproduce this effect with more modern stained glass using simple techniques.
How Can Stained Glasses Be Used In Your Home

- Stained glass door
While doors are obviously a necessary part of any property, they tend to block natural light from entering the interior. However, if you install stained glass panels on the door, you can get the same level of privacy without sacrificing any light!
Stained glass amplifies and beautifies the light, making your space brighter. Additionally, using stained glass on your front door will also enhance the look of your home.
- Stained Glass Kitchen Backsplash
Looking for an inexpensive way to upgrade your kitchen? Install the stained glass backsplash! Stained glass is less expensive than other, more common materials used for backsplashes (ceramic, metal, stone, etc.) and performs the same function.
Customize the color and pattern of stained glass to match the style of your kitchen for a modern and elegant look. It still protects your walls from stains and damage and is easy to clean and maintain.
- Residential Stained Glass Window Installation
Stained glass windows will add a unique character and a charming look to any room in your home. Personalize your panels to tell a story or depict a pattern to complement your interior design scheme. You can also use color to achieve a certain mood/ambiance and add visual interest to your space.
Another advantage of stained glass windows is that they still provide as much privacy as regular windows, but can brighten things up. Ditch the blinds and heavy window treatments for warmer, easier-to-maintain windows.
- Stained glass partition
Zoning is a handy tool for dividing your space into smaller areas for multiple purposes. With stained glass partitions, you can add privacy without sacrificing style. Choose a custom pattern for a personal touch, or simply use untinted, opaque glass.
- Stained glass shower door
Upgrade the look of your bathroom and make showering even more enjoyable with stained glass shower doors! White tiles, white countertops, etc. in the bathroom can feel dull. Stained glass is a unique way to characterize a small space without making it appear cluttered.
In addition, the enhanced light and beautiful colors of stained glass have a positive effect on your mood, making your morning shower more relaxing.
Benefits of Stained Glasses
Make no mistake; stained glass is definitely an expensive addition to any home. However, if you value authentic and custom art, it’s well worth the money! The most important feature is that stained glass art can add color to a room. Whether it’s simply in the form of a small panel hanging on the wall, or sunlight streaming through a stained glass window, guests will be hard-pressed to miss the impact your stained glass has on your home’s decor.
Stained glass can also provide impressive privacy. By creating a design that incorporates textured glass or even etched glass, you can obscure the view of outsiders and keep snoops or peepers at a distance. That’s why stained glass is perfect for home entrances and bathrooms.
3 Ways To Stain Glass Bottles
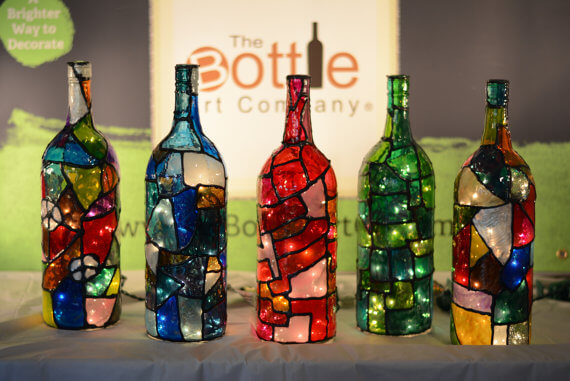
Mod Podge and Food Coloring
Mod Podge and Food Coloring is a way to make water-based colorants that are easy to use. It is non-toxic and does not require the use of any solvents. All you need is a mod pod, food coloring, a brush, and a sealer.
Apply a thin layer of mod podge to the surface of the glass object with a sponge brush and let it dry for 20 minutes. Don’t apply too much Mod Podge as it can cause drips and drip marks on your dye job.
Mix food coloring in separate containers until the desired color is achieved. Let each layer dry before adding another layer, otherwise, there is a risk of streaks forming. Finally, after finishing the last layer of mod podge, seal your project.
Mod Podge and Food Coloring
The second method uses the same ingredients, but in a slightly different way. Although the color is long-lasting, I don’t recommend using it on projects with water as they can get cloudy once you want to clean the jars/bottles.
Combine mod pods, food coloring, and water in a bowl. Add enough water to the mixture to make it “thick but not too thick”. 1:2 water to mod podge ratio is good. If you’re dyeing more jars/bottles, once you get the hang of it, you can make a larger batch so the mixture doesn’t dry out.
The proportions above are enough for a small jar. Keep this in mind if you need more stains. Pour some of the mixtures into a jar and swirl until all inner surfaces are completely covered.
Put the jar upside down on a few sheets of newspaper and let it sit for about 1 hour. Then, place them face up on another piece of baking paper and bake with parchment paper. Bake in a 225°F oven for about 45 minutes.
Stain Glass Bottles With Glass Paint
This method produces a permanent water-resistant color, so it’s great if you want to use it to color vases and other items that come in contact with water. All you need is glass paint, paint thinner, and a foam brush.
Mix a drop or two of paint and a small amount of thinner in a plastic container. The thinner the color, the lower the intensity, and the thinner, the higher the intensity, the thicker the paint.
Apply the paint to the desired glass surface with a foam brush. Make sure to clean the glass surface thoroughly. Work quickly, using long strokes to cover surfaces. Make sure to remove all air bubbles from the surface.
Prepare a baking sheet lined with aluminum foil and place all the paint on it. Set the oven to 325°F/160°C, and when heated, put in the glass. Set a timer and bake for 40 minutes. When the time is up, gently open the door and let them cool slowly in the oven.
You can stain the outside of your glass jar or bottle this way, as it’s a permanent color that won’t wash off in the dishwasher.
Tips On Properly Using The Staining
- Before applying any of these methods, be sure to thoroughly clean the glass surface. Remove all labels, oil, and stains.
- Apply a thin coat of mod podge mix/glass paint to the surface with a sponge brush. If you want more coverage, add more layers. Glass paints are available in opaque, pearly, and translucent.
- Mix food coloring in separate containers until the desired color is achieved. Don’t stir too much at once, as the glue will dry quickly.
- Get creative! The sky really is the limit when it comes to how many different designs or tinted glass can be created by mixing and matching these methods together in various ways.
Conclusion
I hope you enjoyed learning about the various methods and materials for dyeing glass bottles and jars. If you are new to any of these, I suggest you try them out and find the one that best suits your needs.

